Why my method?
Foundation Paper Piecing can be a mind bender for people new to the technique. After teaching the technique to multiple classes of middle schoolers, I decided to share the techniques and visual supports I use for them that help simplify and ease each of the layered skills that make up this type of sewing.
Tools I recommend:
(scroll down for a video explanation)

Must Have Tools for My Process:
iron/pressing surface
rotary cutter, small ruler, & cutting mat (in close proximity to sewing machine)
tool for creasing paper pattern template along seam lines (library card works)
washable school glue stick (you can thread baste instead if you like)
seam ripper (mistakes are learning opportunities ;))
pencil or pen (for marking paper)
colored pencils (basic set is all you need)
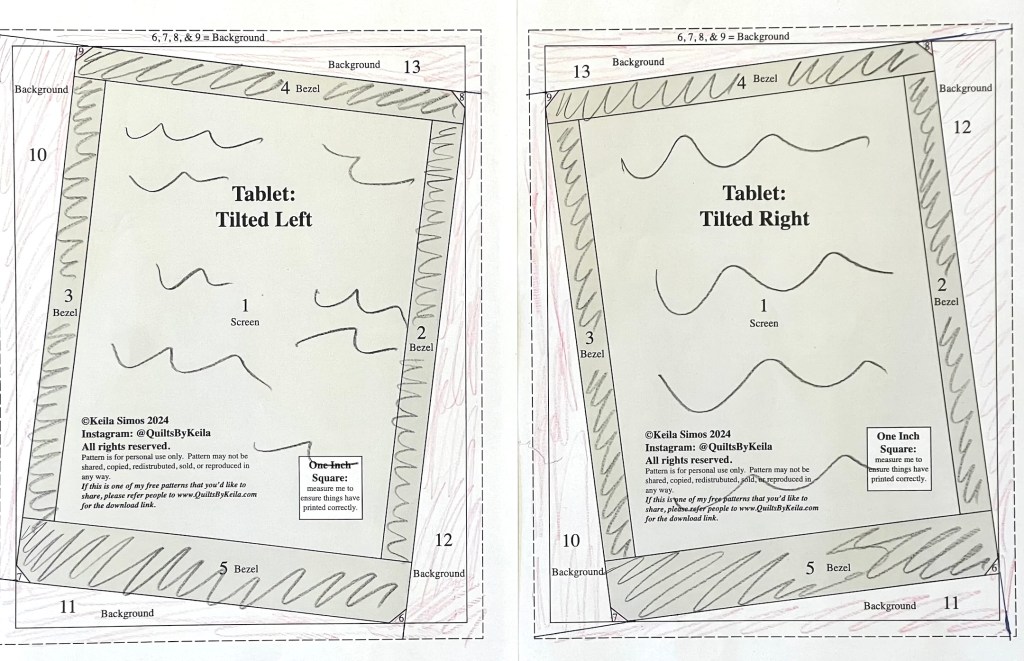
sewing pins/sewing clips (for connecting pattern segments – the initial tutorial pattern, a block featuring a tablet, doesn’t have pattern segments; but future tutorials may)
Helpful Tools if You Know You’ll Love FPP:
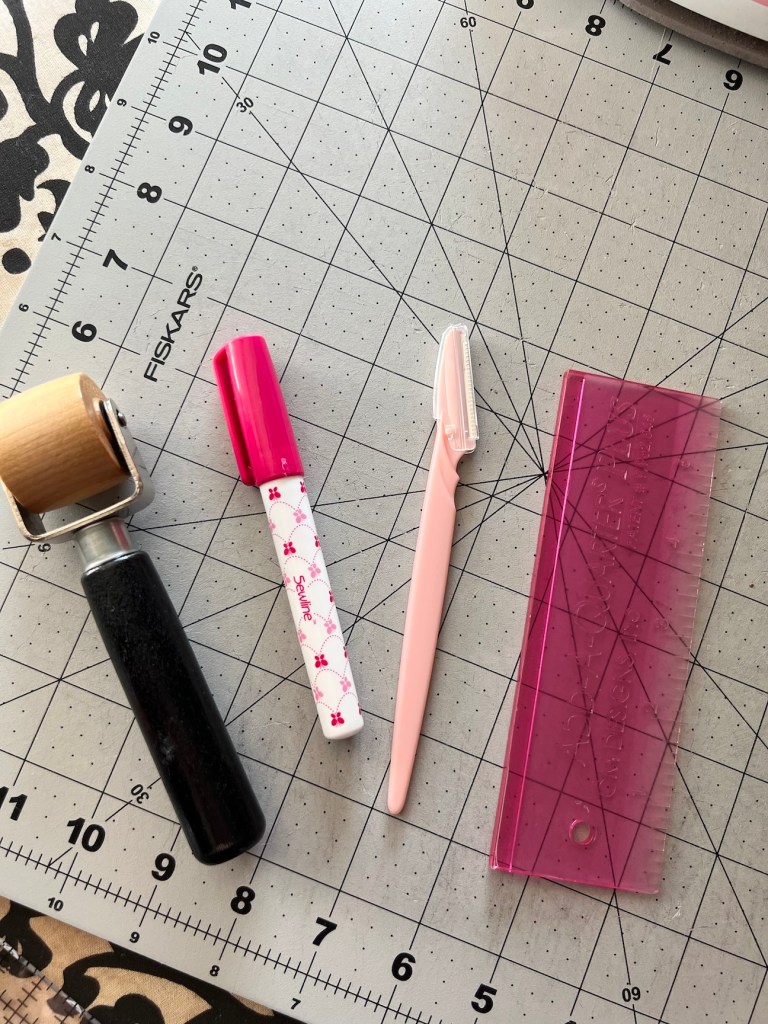
seam roller (for use in lieu of an iron)
Sewline glue pen (or comparable brand – more precise gluing capability)
eyebrow razor (makes seam ripping connected template segments easy – the initial tutorial pattern, a block featuring a tablet, doesn’t have these; but future tutorials may)
Add a Quarter Plus ruler (I use the 6″ for everything, although I do have the larger one as well: makes creasing the paper pattern template and trimming seam allowances to 1/4″ easier)
FPP Tools Video Explanation:
Coming Soon:
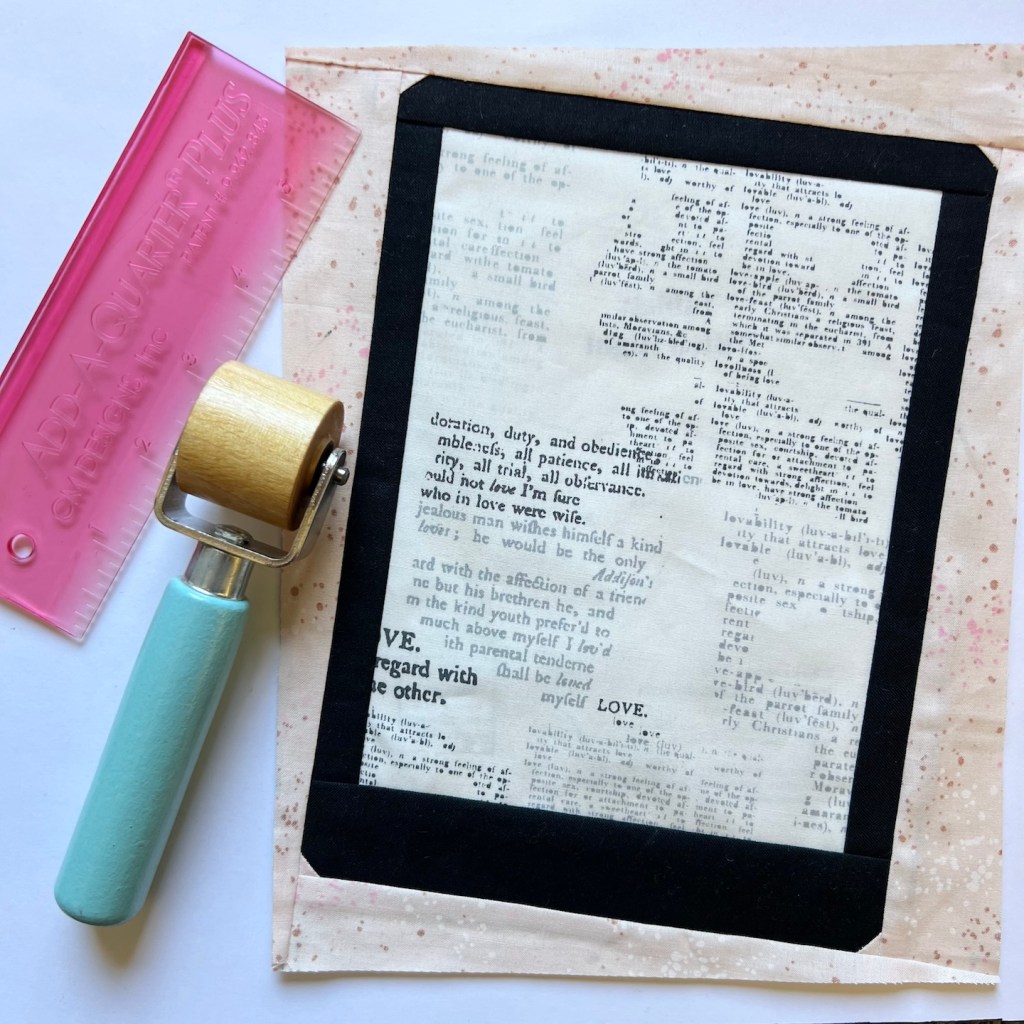
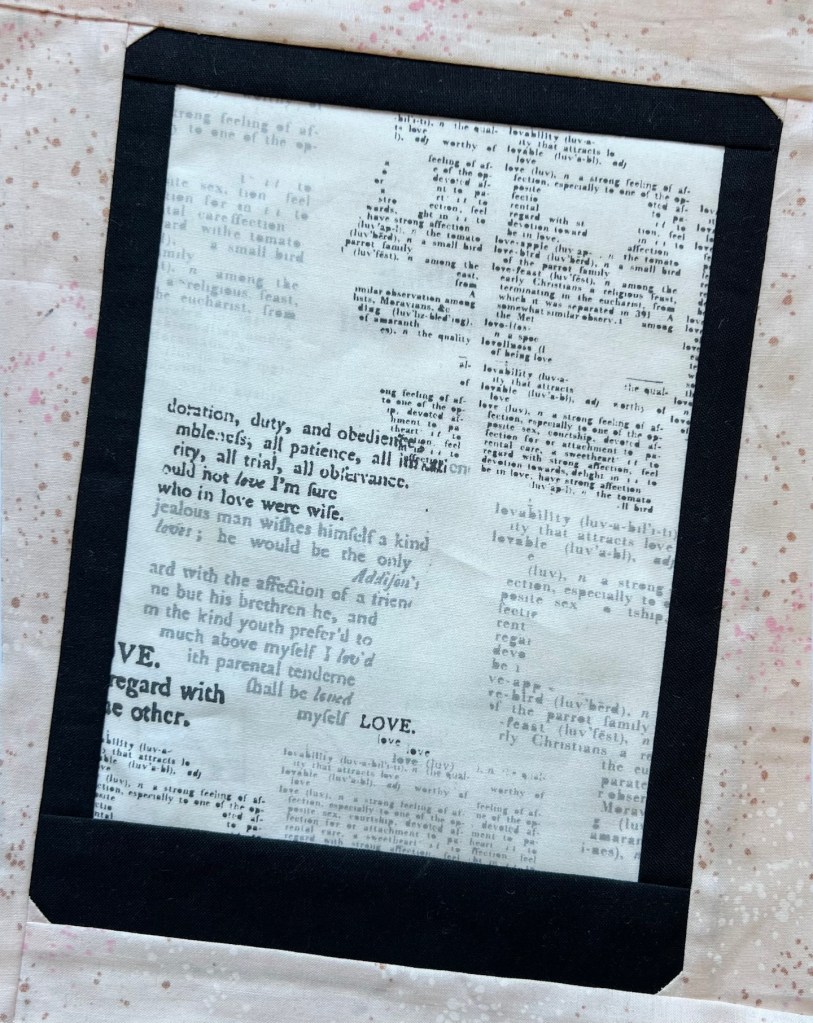
- A beginner FPP pattern download for you to practice on (sample finished block pictured)
- Suggestion links for other beginner FPP patterns that have worked well for my students (in case you’d prefer a different block to work on)
- An explanation of how I prep my patterns and fabrics to make FPP easier
- Video tutorials teaching you how to foundation paper piece with confidence and ease, walking you through the process of making my pattern (easily applicable to the other patterns I will recommend)
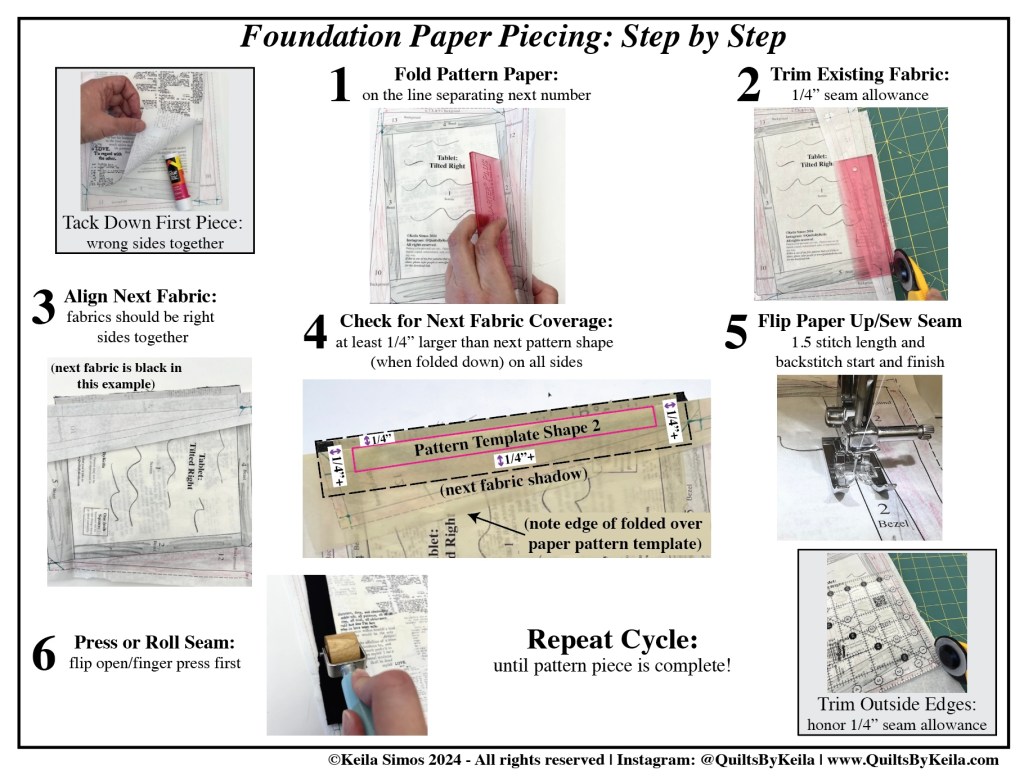
- A downloadable FPP Steps reference guide (pictured below)


Leave a reply to Keila Simos Cancel reply