First things first: my niece wants me to be clear that Noelle is HER dog, not my sister’s (as I said in my video). This is actually quite true, and I stand corrected and apologetic ;).
I’ve created some tutorials before, but this one is the first for this website, and also the one I’ve worked hardest on. It has spoken English/edited captions as well as ASL, so hopefully all my quilty friends can enjoy it.
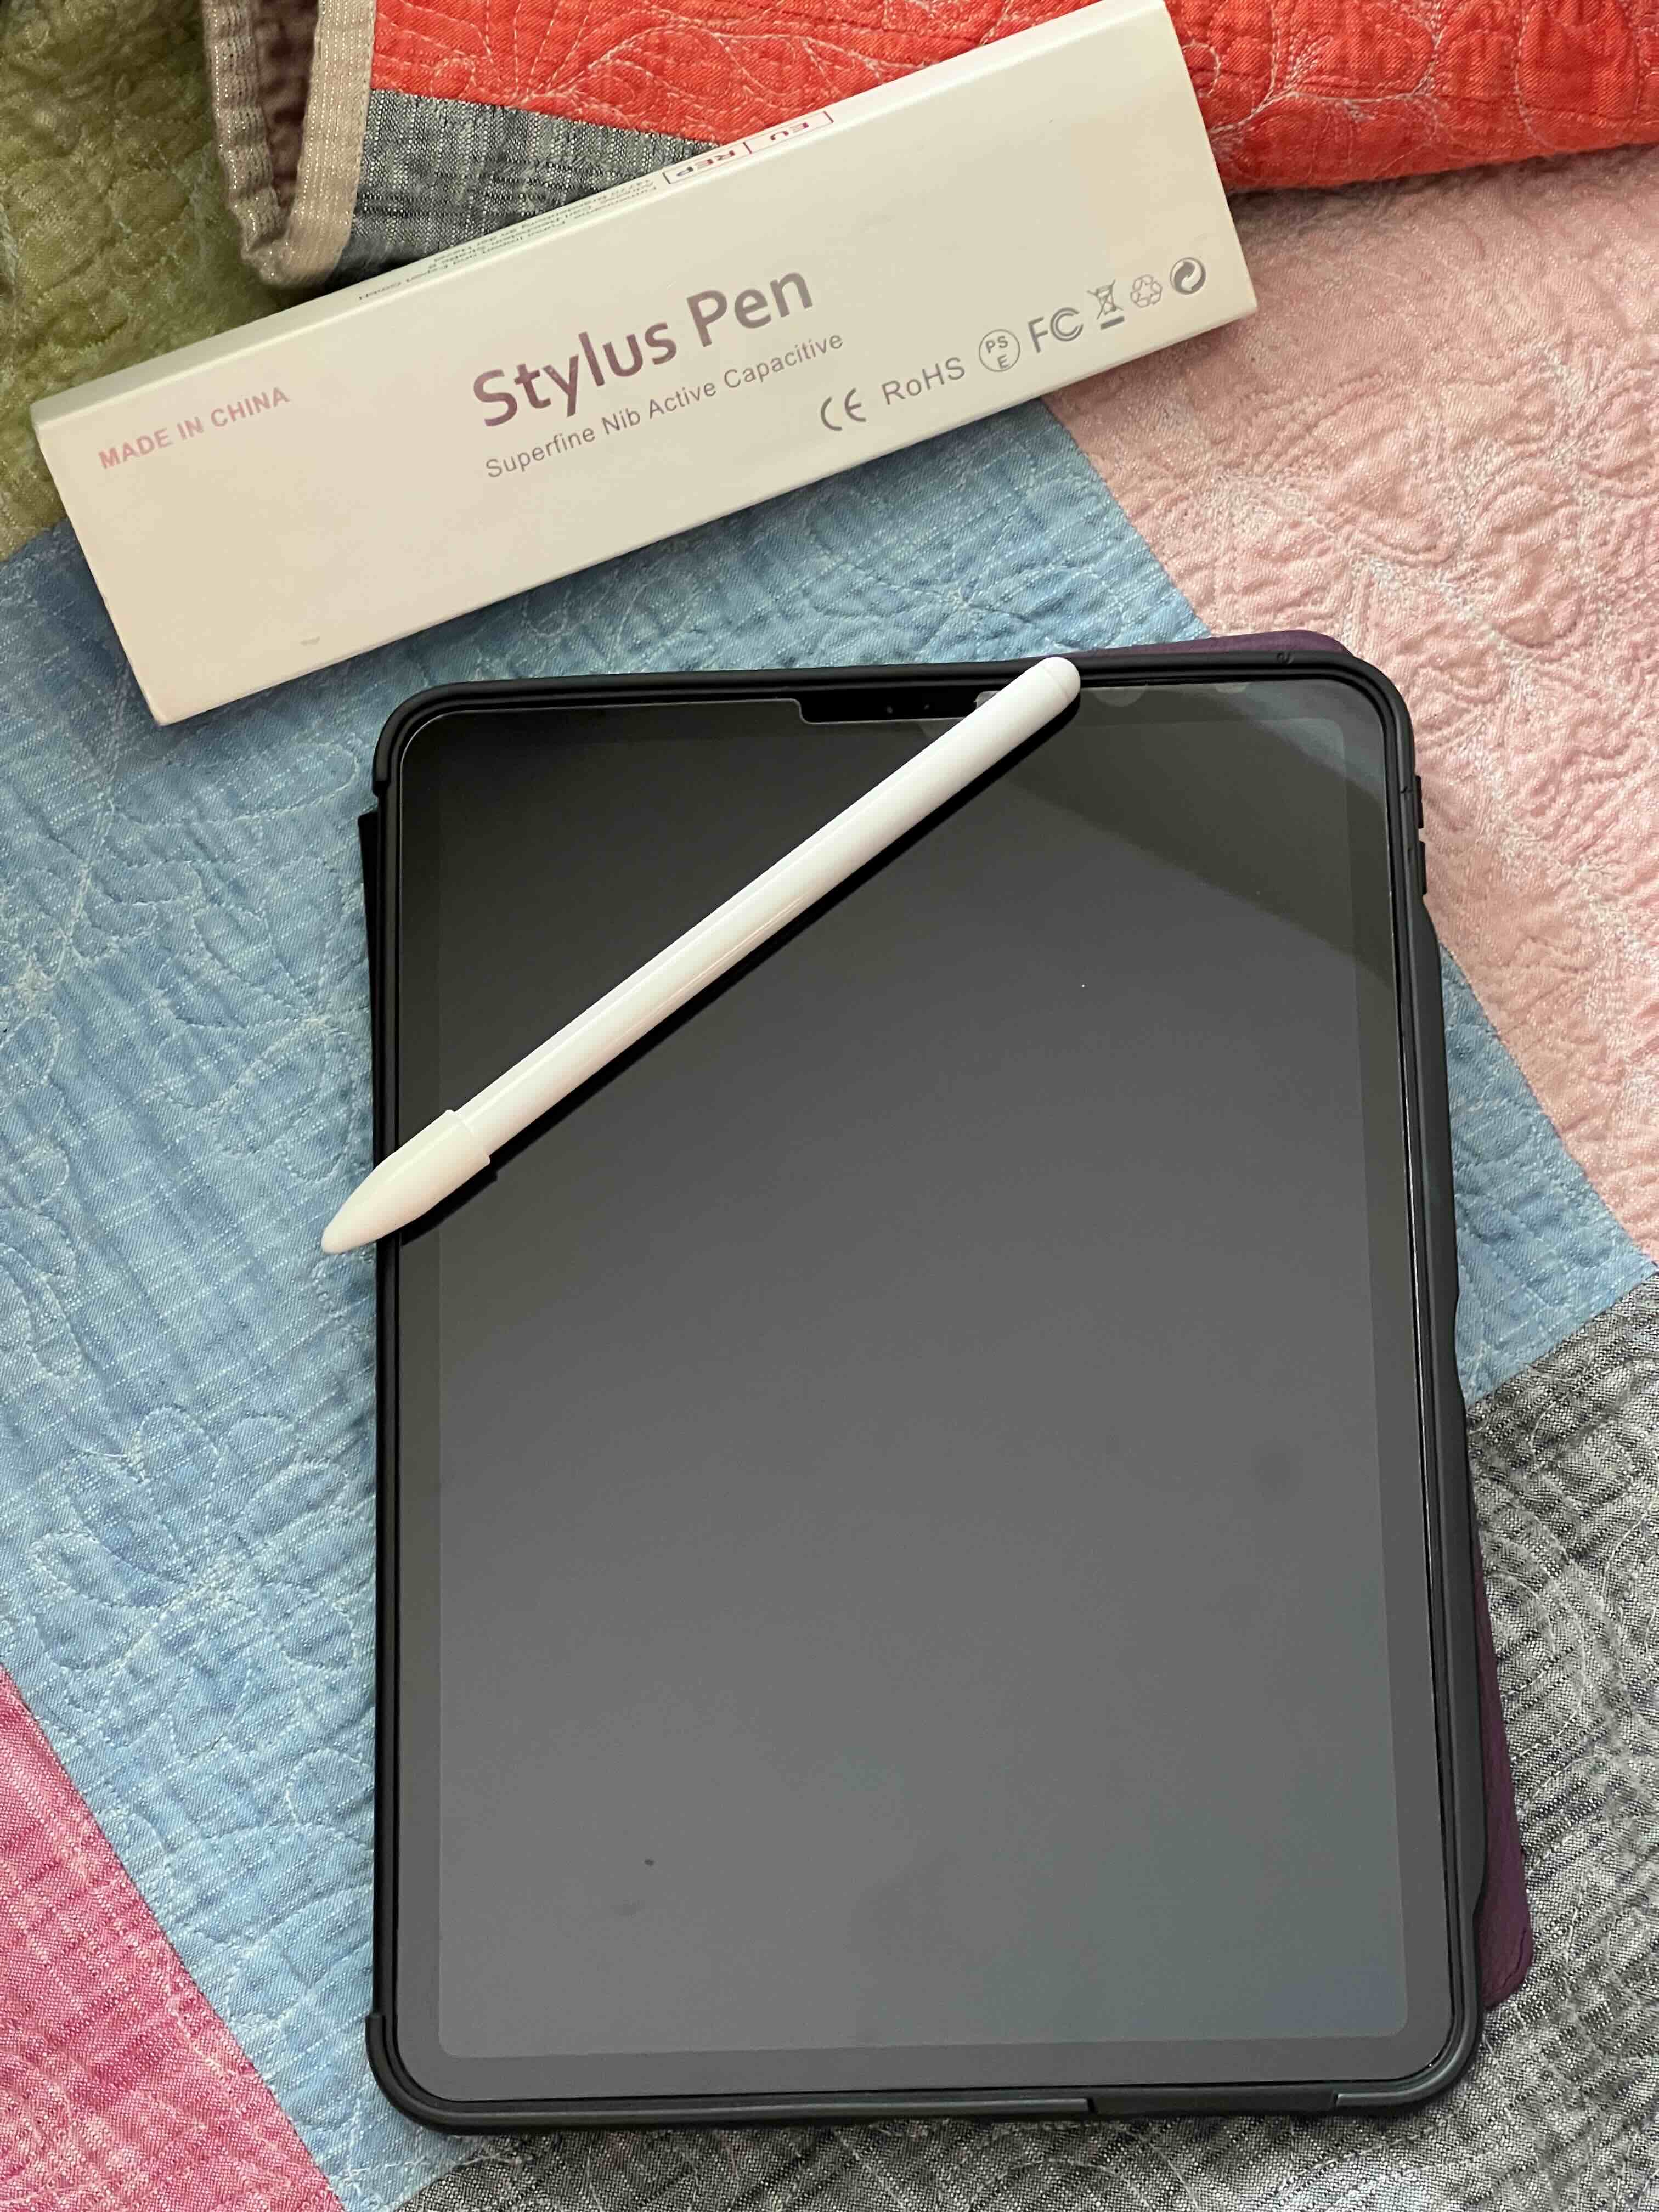
One thing I forgot to include in the video is that you’ll need a tablet (iPad, in my case), the app Procreate (or something similar), and a stylus to create the pattern. If you’re old school, you can use the same principles with tracing paper and a photograph – outline it in sharpie and take it to your local print shop to enlarge it to the size you require.
I highly recommend watching the video (mostly because I’m so proud of it!). But here are some basic step by step notes for when you just want a quick glance to remind you of the process:
Preparing the Image
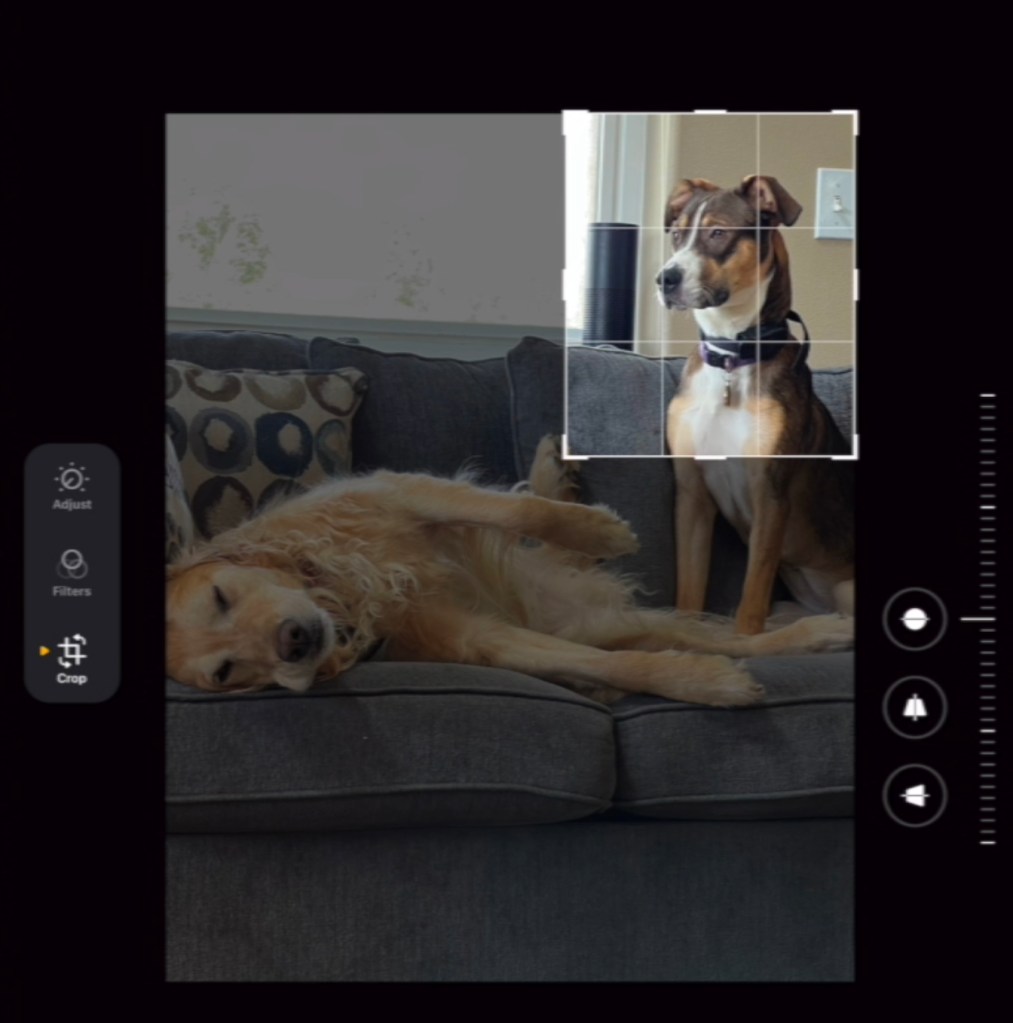
- Choose an image you already have or take a photo.
- Crop out anything large that you don’t want in the photo.
- Shift the image within the cropped space to about where you want it in your final collage. Not pictured, but I shifted Noelle so she’s more to the right than centered.
Procreate: Initial Settings
Create a canvas:
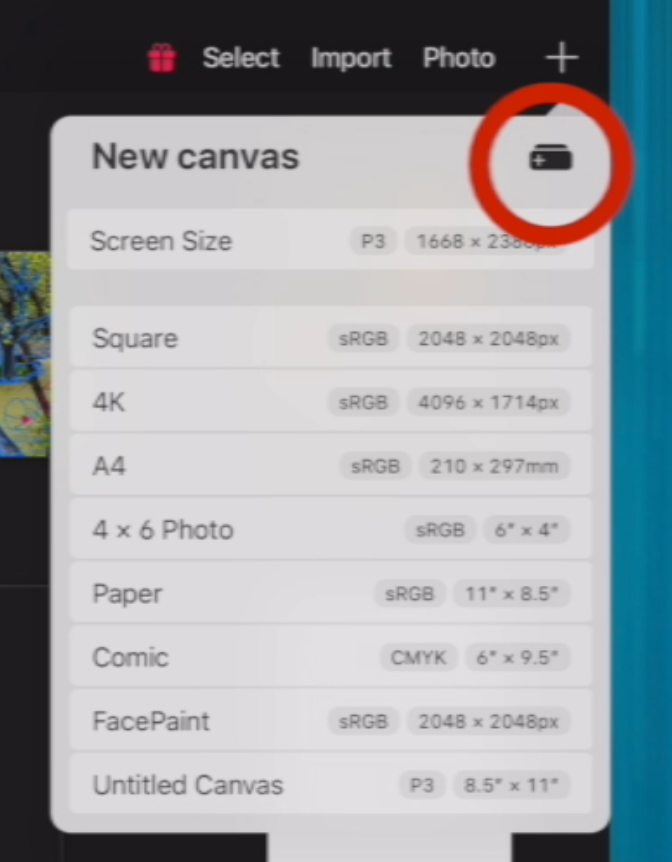
- Click the plus sign (+) on the top right of the Procreate Gallery screen.
- Select the icon for “New Canvas”
- Change the setting options to “inches” from pixels, enter desired dimensions and click “create”.

To place your image on your canvas:
- Select the wrench icon in the upper left of your screen.
- Choose “Insert a photo” from the drop down menu.
- The photo will be inserted in the center of your white canvas. Using your fingers to pinch and stretch, adjust the size of your image so it fills the entire white canvas (so it ends up the dimensions you chose when creating your canvas).

Most Important Step: Create Layers
- Click on the Layers icon in the top right of the menu bar (looks like two squares overlapping each other)
- You should have two layers: a white background and layer 1 with your photograph.
- Use the plus sign to add a third layer. Be sure this one is selected when you begin creating your sketched pattern.

Setting Brush Style & Color
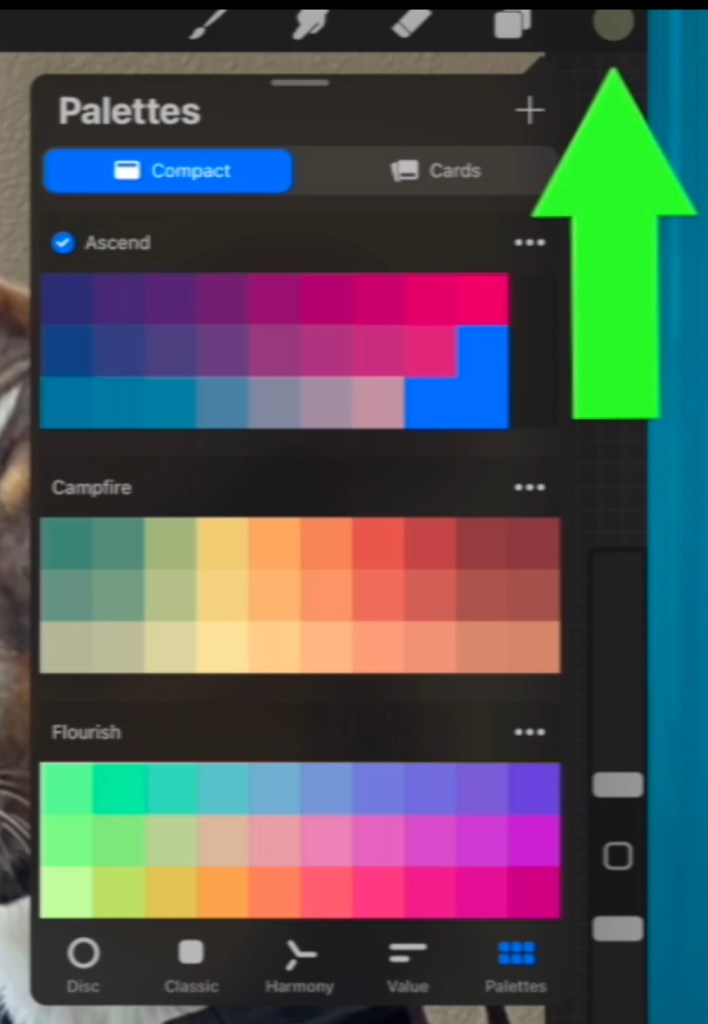
- Click the circle on the top left and choose a color that will contrast with your collage.
- Click on the paint brush along the top menu, go to the “Calligraphy” category, and chose “Monoline” for your brush stroke.

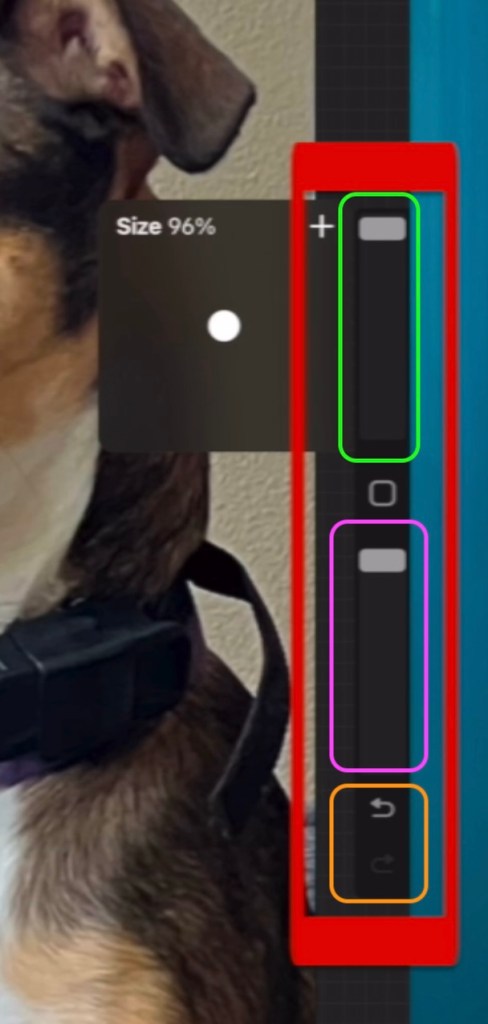
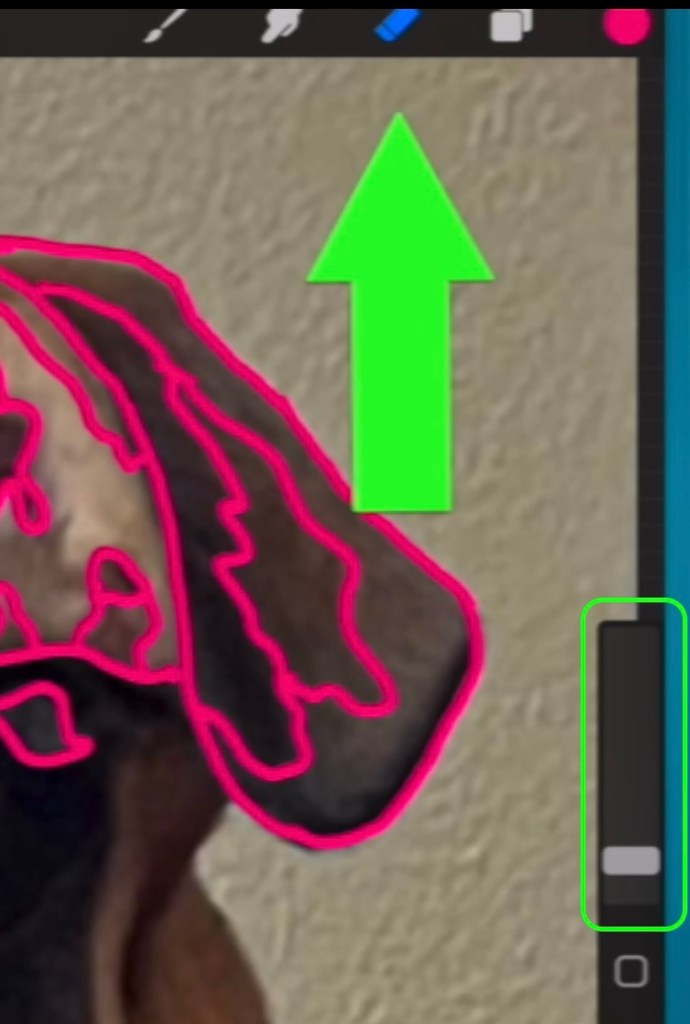
Slider Bar
By default, the pictured slider bar is on the left of your screen. I dragged it to the right side for convenience.
Use the slider in the green box to adjust the size of your brush and eraser strokes.
Use the slider in the purple box to adjust the opacity (degree to which you can see through your markings). For fabric collage pattern making, I have mine set as far up as possible.
In the orange box, you can see the undo button. Below it a redo button will show up if there’s something you can redo. I use these a lot!
Sample Brush Setting:
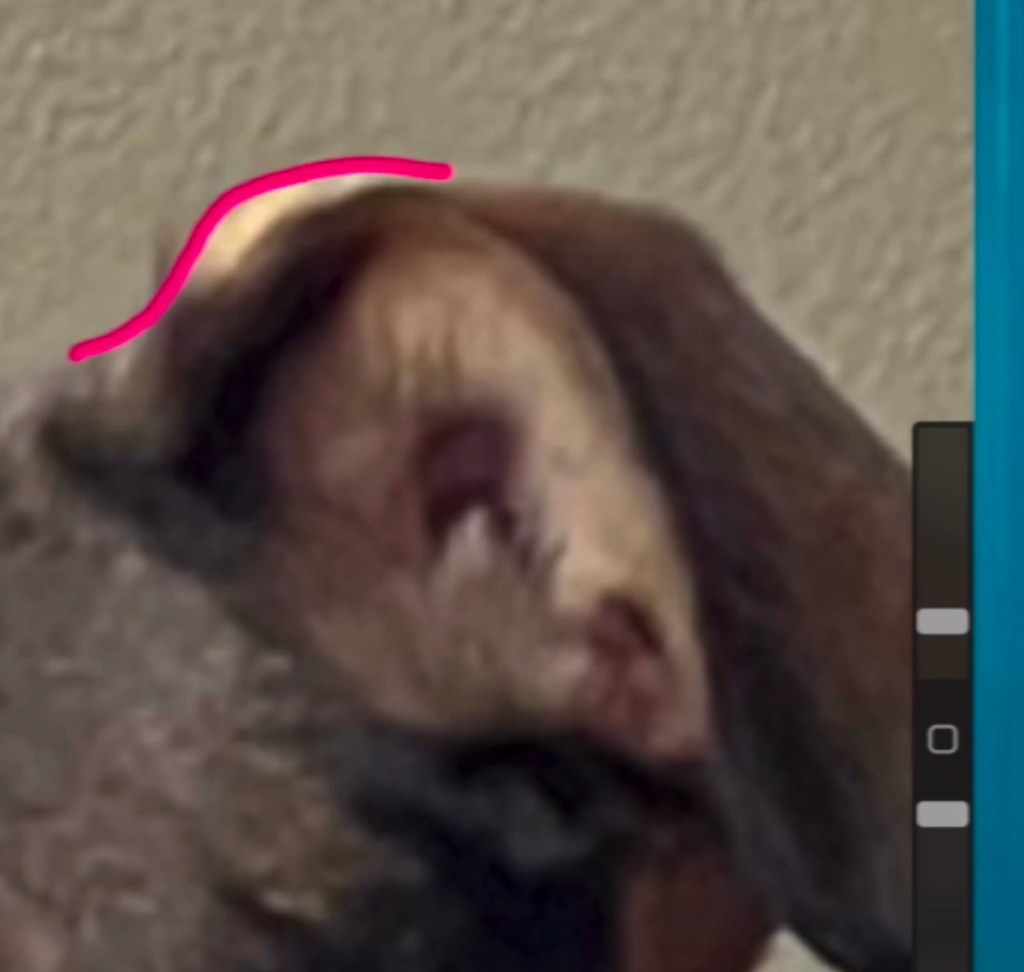
Zoomed in, this is the size of the typical brush stroke I use when creating my pattern. Experiment with the size slider (pictured in green above) to find a setting that will be easy to see in your future collage pattern but also allows you flexibility to easily draw around shades of color in your collage.
Eraser
Use the eraser to remove parts of brush strokes when clicking “undo” will remove too much of your work. Be careful to adjust the size slider so you can erase quickly but with a targeted range (versus tiny erasures that don’t show or huge erasures that obliterate nearby drawn lines).
Pattern Drawing Techniques
Basic Principles:
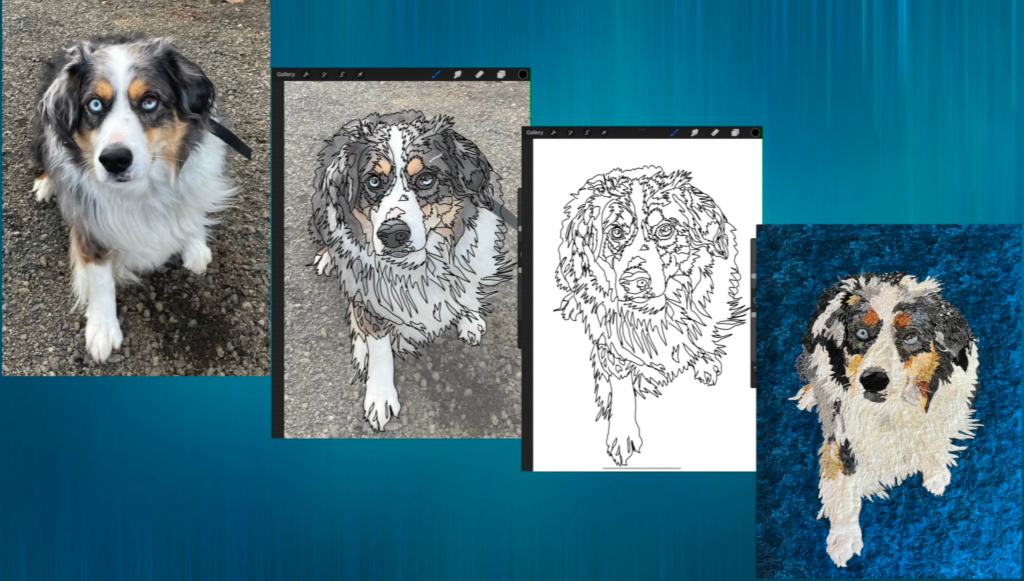
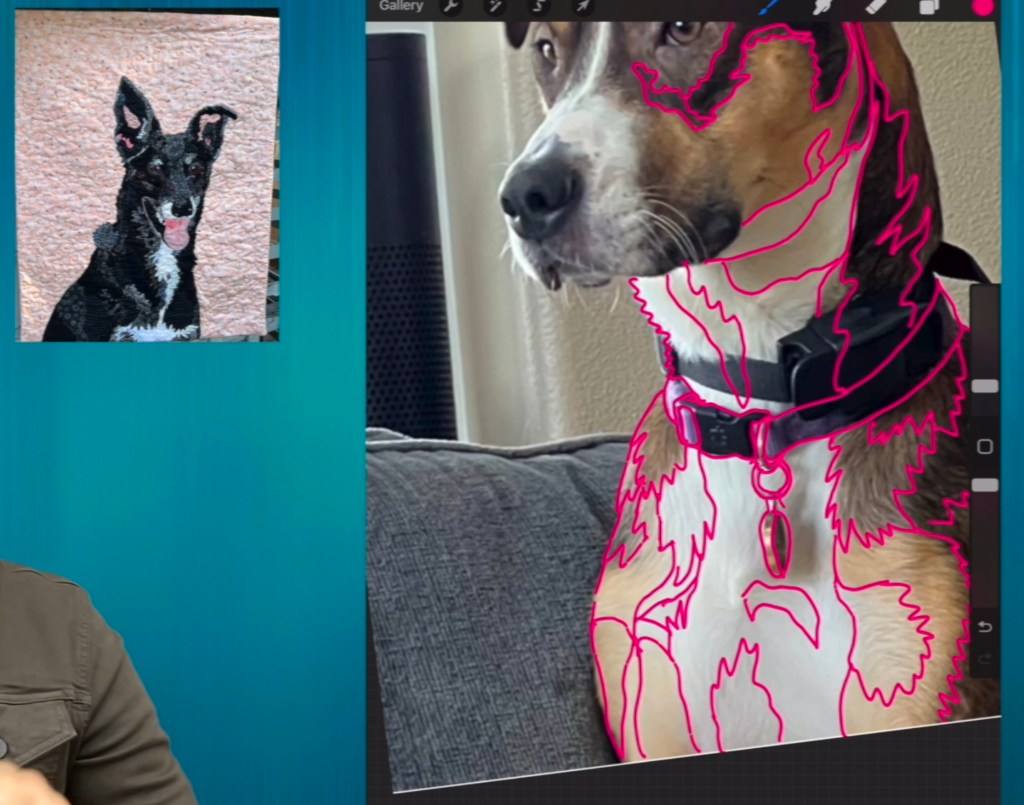
Create the collage pattern by tracing shades of color in your subject (whether that’s an animal as in my example or something like a landscape).
Balance capturing detail with keeping things simple enough to be easily translated into fabric. The more complex your pattern drawing, the harder it will be to create and stitch down your collage. I like detailed collages, so often I have to eliminate lines later to keep things reasonable.
Do not feel bound to everything in the image. Here I’m only including one of Noelle’s collars. Reference other photos if you need help creating a pattern underneath whatever you’re choosing to not include.

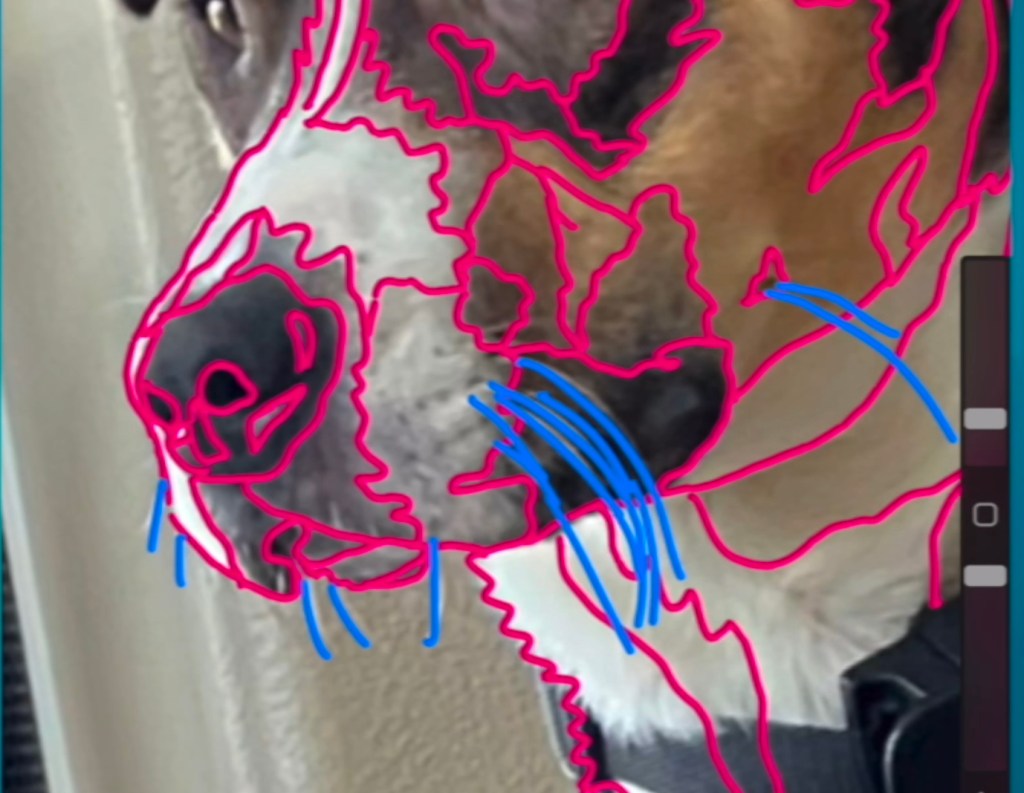
Handling Patches of One Color
When an area is one color (like Shadow’s black coat or Noelle’s white chest), focus on outlining shadows in the same color area. This will add complexity and interest to your final collage versus the flatness of using one fabric. Choosing fabrics by color value will help show darker and lighter patches or reflections in your subject. The same is true of landscapes with grassy or beachy areas.
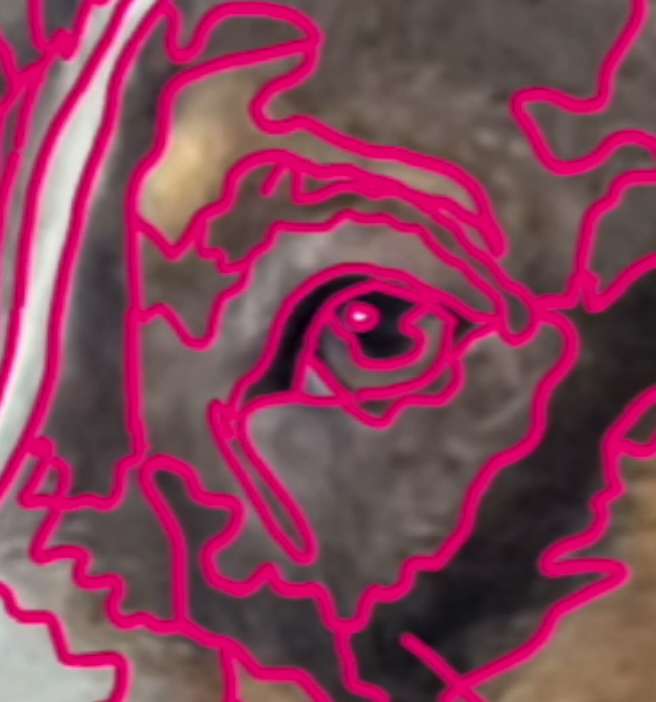
Animals: Tricky Parts
Eyes and noses are hard! For the pattern making, keep things as simple as possible while keeping the main details.
Change colors for anything you will add in a different step of the process.
Finishing Up
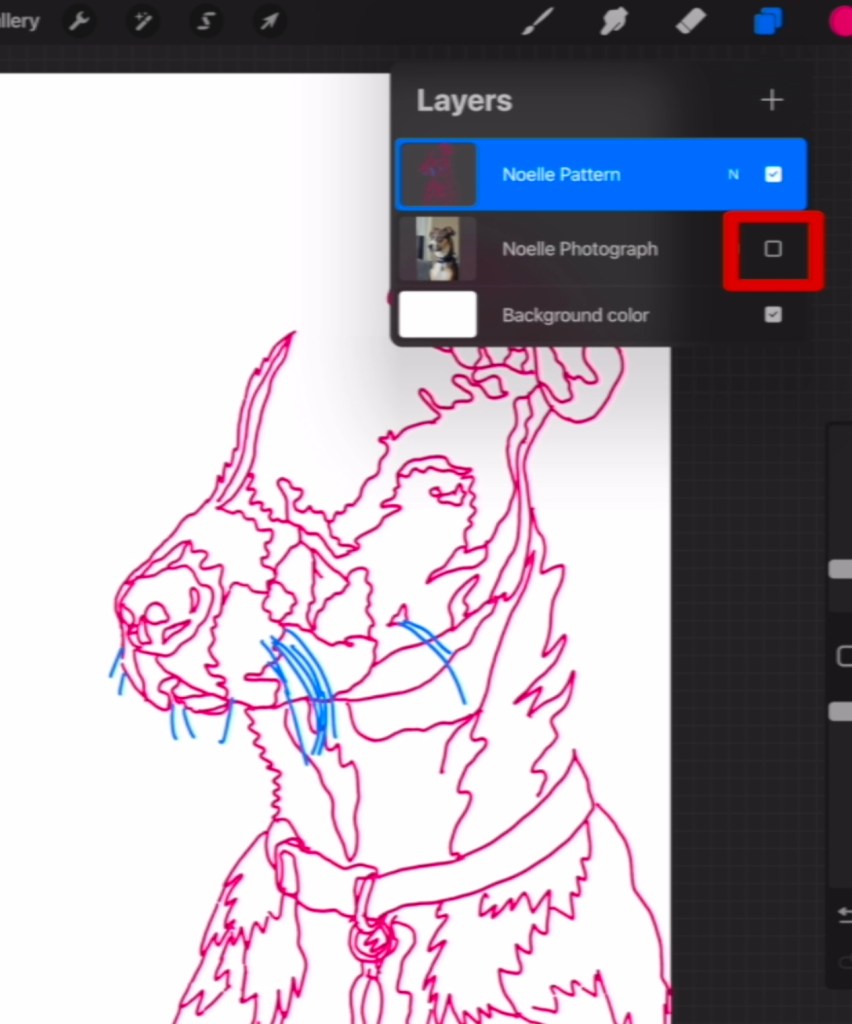
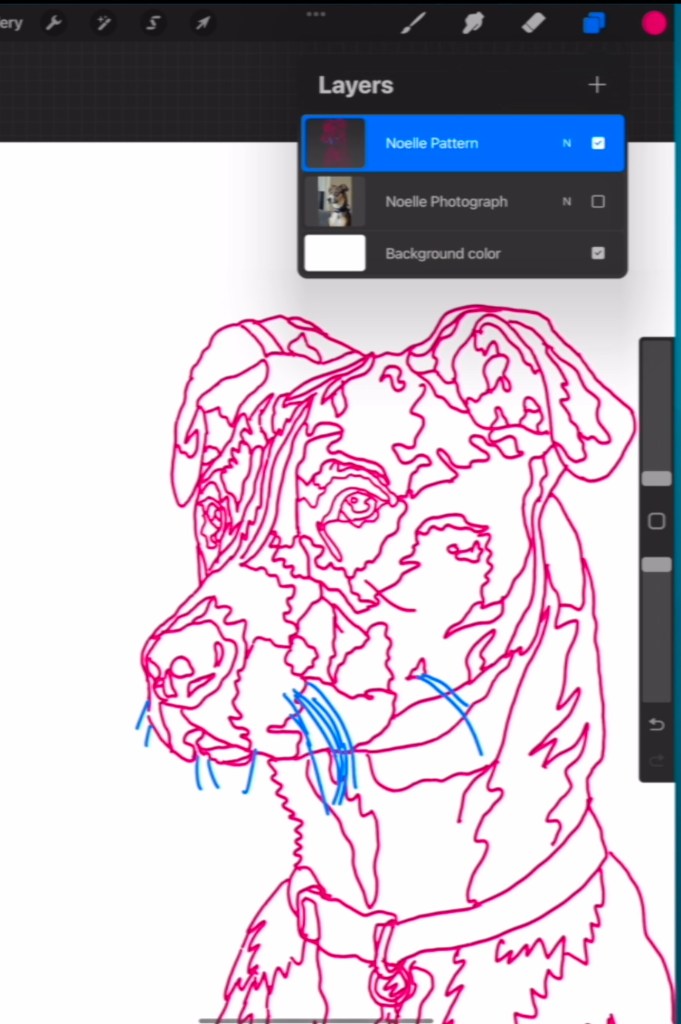
Sometimes it’s hard to tell which parts of the pattern you’ve finished. Using the layers menu, unselect the photograph layer (labeled “Layer 1” if you didn’t rename it). This will show just your drawing on top of the white background and highlight missing pieces.
Do a final check before exporting your pattern so you’re sure you’re happy with the completed pattern.
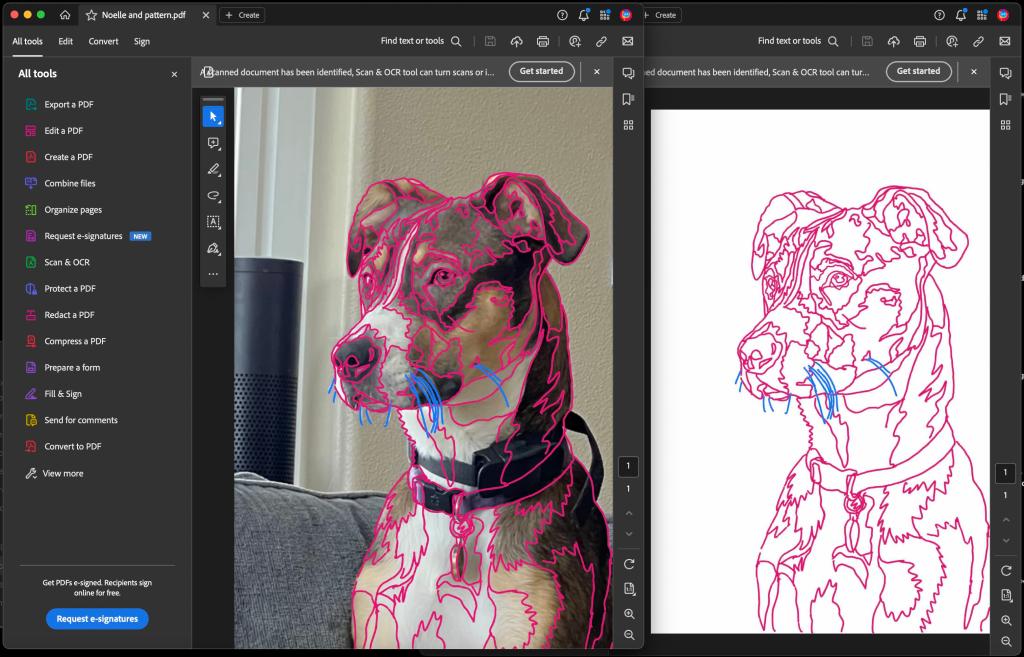
Exporting Your Pattern
I like to export two different files from my pattern. One with the photo and collage pattern lines for reference, and one with just the collage pattern lines. I prefer to create my collage using just the collage pattern lines, but some people prefer to build their collage on the pattern with the image (or even a grayscale version of the image) to help them decide on color values for their fabric choices.
To export a file with the pattern lines AND the photgraph:
1. Be sure the layers you want are selected (either all layers or just the background and pattern line layers)
2. Click on “Gallery” along the top left of the menu bar to exit the individual file.

3. Choose “Select” and then tap on your recent collage image to select it.

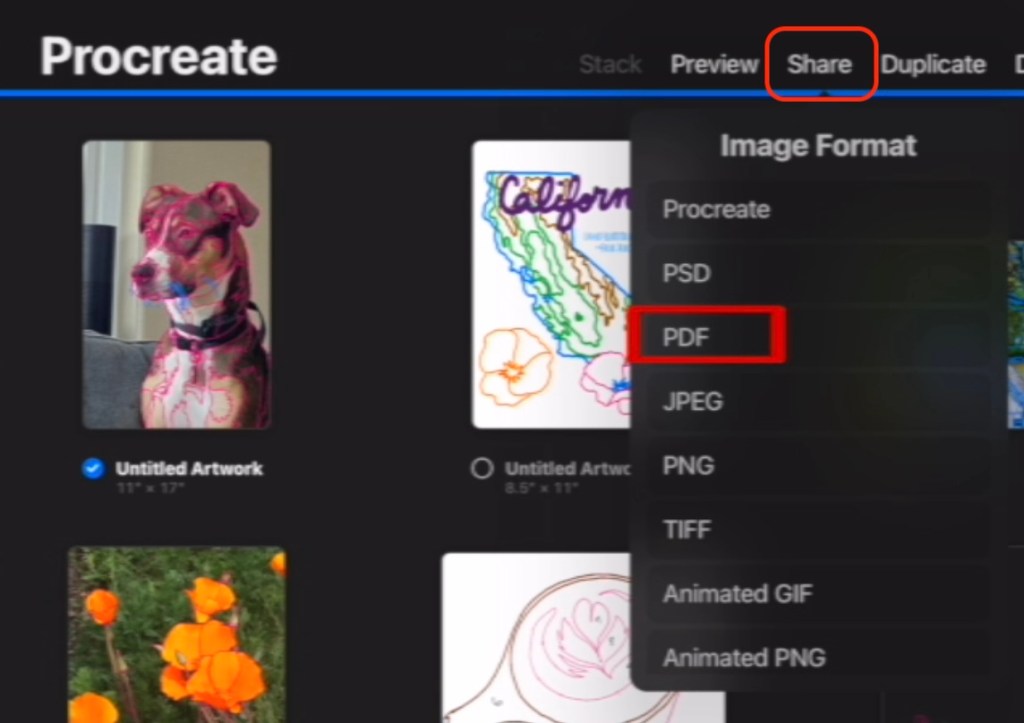
4. Click “Share” along the top right of the menu bar.
5. Select PDF and choose the quality option you prefer (I’m not sure what you should do, but I chose “best” for the photo & the collage lines and “good” for just the pattern lines).
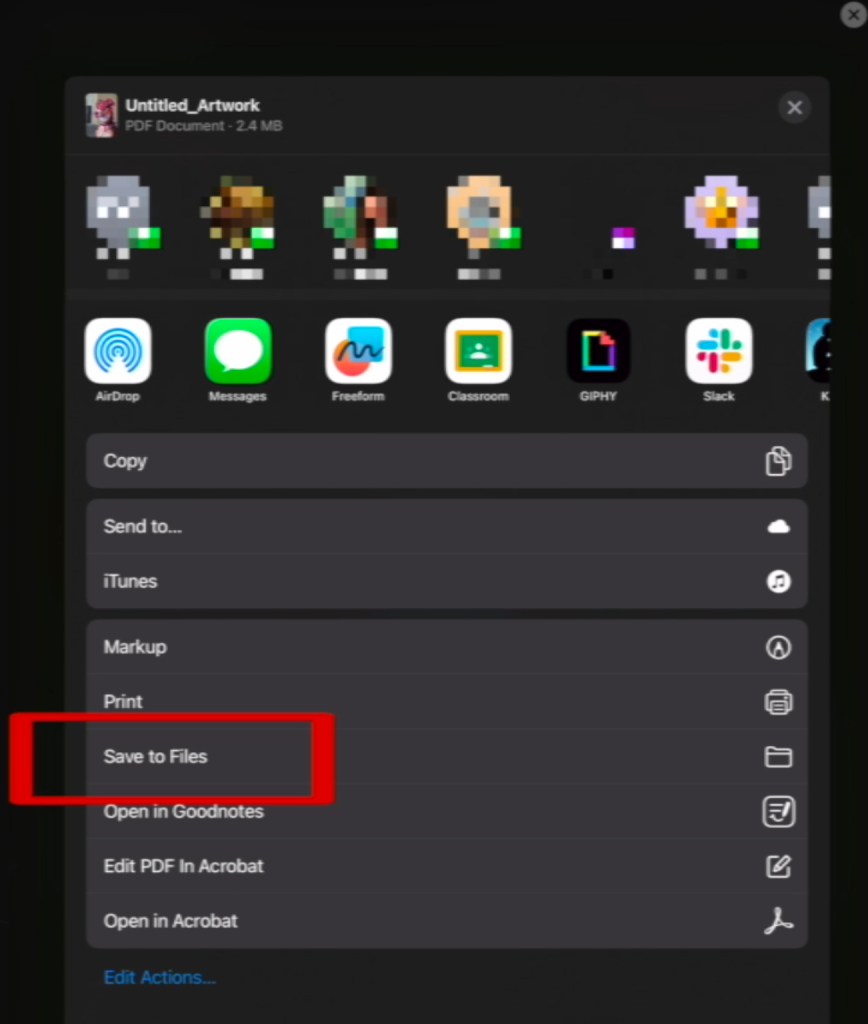
6. Choose what to do with your exported file. I typically “save to Files”. (My iPad and computer have synced files, so this is an easy way for me to access the patterns on my computer to print or further edit).
7. If saving to files, select a folder and rename.
8. Return to Procreate and click the X along the top to exit out of the “Select” menu. You can then reenter the file and adjust your layers selection if you want to print a different version of the pattern (see image below).

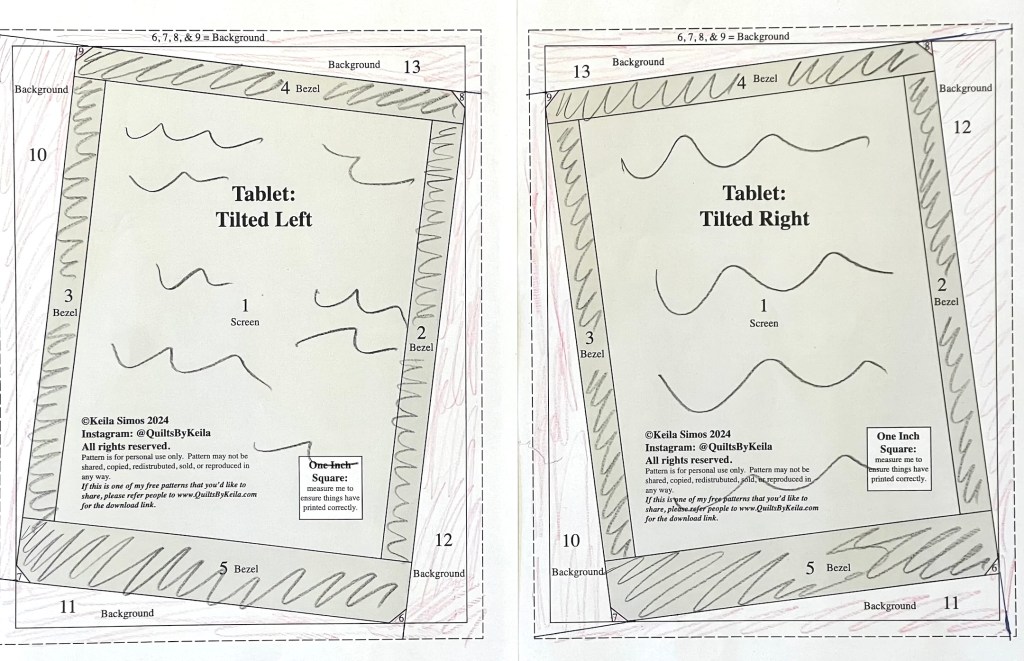
Printing
If your collage is smaller than whatever paper size your printer can handle (meaning it will fit on one page), you can print it easily. If it is larger than one sheet of paper, you have two options:
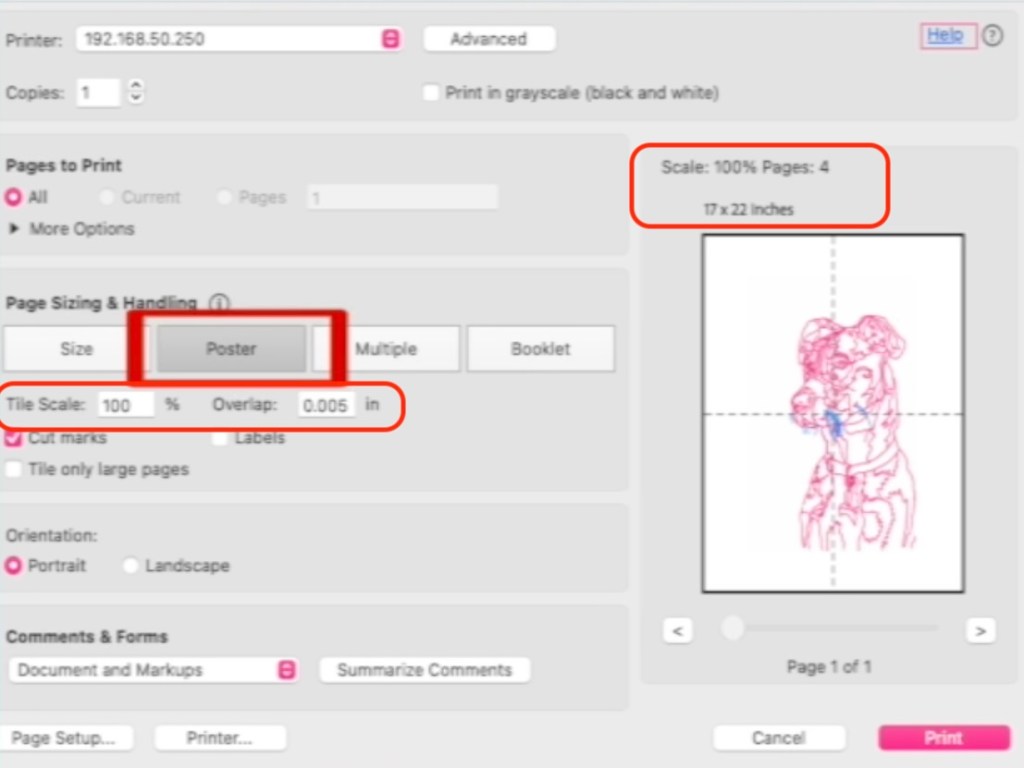
1. Use a paid version of Adobe Acrobat to print as a poster/selecting tiling options that you prefer:
2. Take the file to a print shop/local office supply store that does printing and have them print it as a poster.
I genuinely hope this tutorial was helpful! Leave me feedback or props in the comments if you would so I can factor them in when designing future tutorials.


Leave a reply to Keila Simos Cancel reply