Readers – Scroll down for the article
Viewers – Click on the video for an ASL/spoken English walk through of the tutorial content
Let’s Start with a Metaphor
When I was creating the video for this tutorial, my hard drive ran out of space. Between OBS running a new plugin I was trying and Final Cut Pro trying (and failing) to export a video, a bunch of error message windows popped up all over my screen and the apps just froze.
Some work was lost, and if I were less confident in my husband’s abilities to rescue me if things really went sideways, I’m sure I would have given up. Instead, I walked the dog, sulked, and rallied to try again a couple hours later. During my sulk, I realized the experience was the perfect metaphor for what I think my way of teaching foundation paper piecing does for you.
Learning to FPP can sometimes feel like overwhelming your brain’s working memory and flash flooding it’s ability to store new information and learn. What I’m trying to do with these tutorials is to deconstruct the steep learning curve into smaller chunks so when it’s actually time to learn the sewing process, your brain has crossed off a bunch of tiny decisions along the way and is more freed up to process and learn a challenging new process (foundation paper piecing) successfully.
Some of these tricks in this post and future posts I still do myself, a lot of them you won’t need once you’ve learned how to foundation paper piece confidently. To help you figure out which ones you want to keep doing and which ones you don’t need and can let go of, I recommend doing all of my suggested steps at least once. My eighth grade students use all of them multiple times until they just naturally drop the ones they don’t need without us having a conversation about it.
Pattern
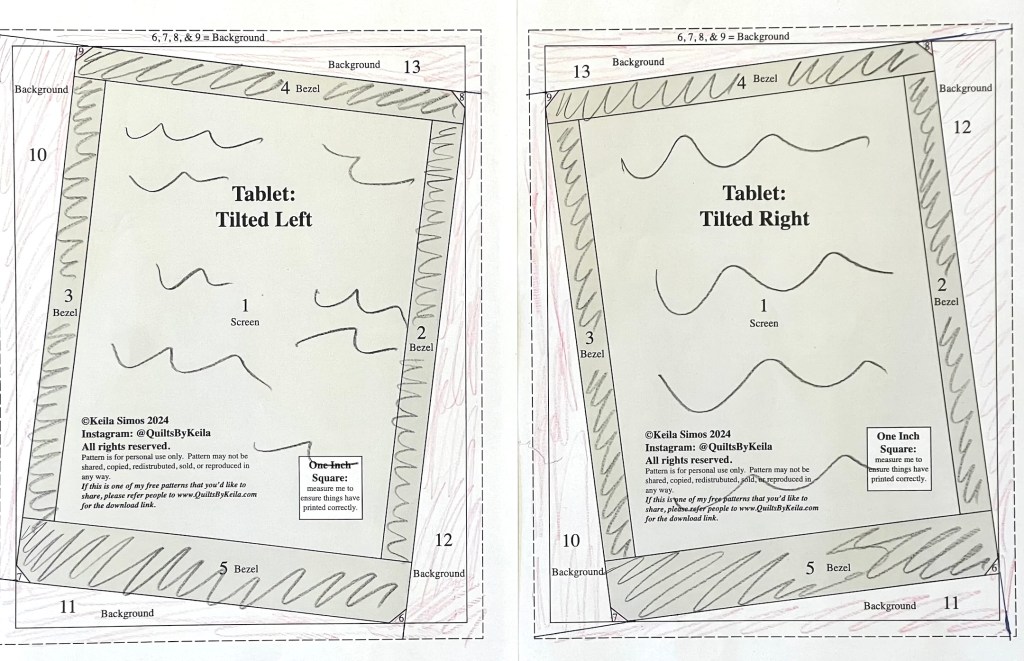
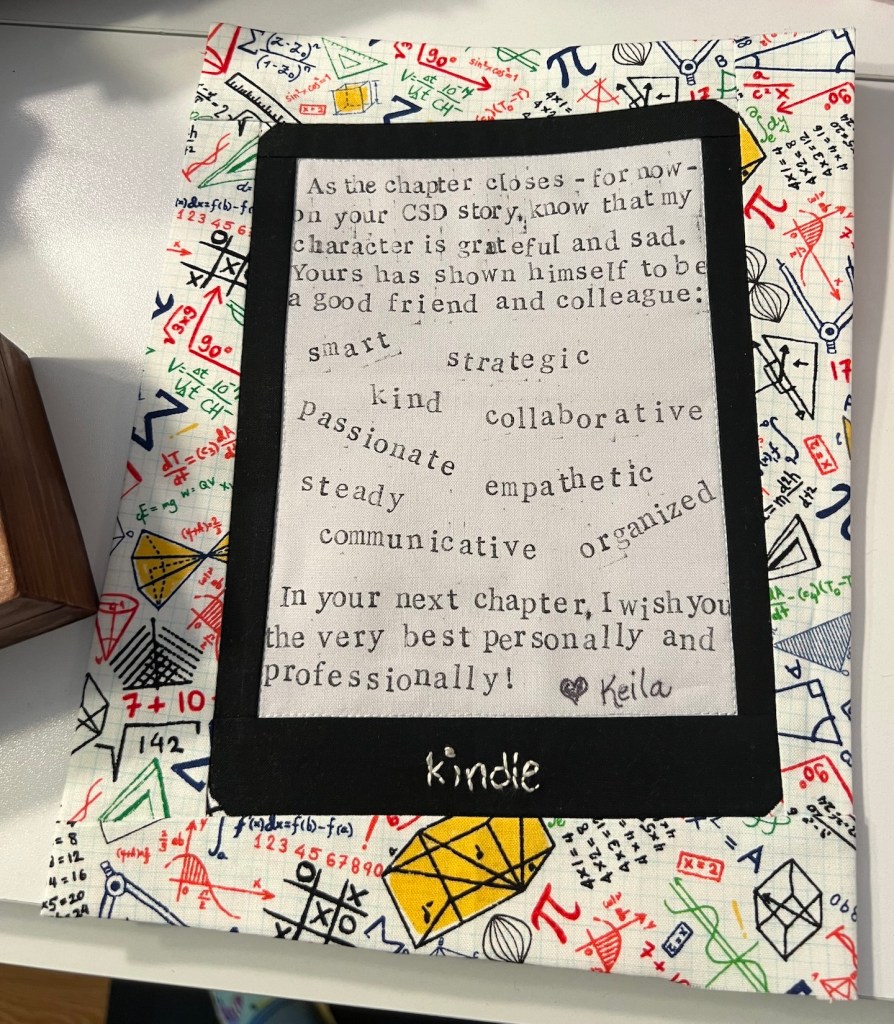
For this tutorial series, I created a simple foundation paper piecing pattern to use in my demonstration videos. If you want to sew along with me using the same pattern, I would love that. If you’re on social media and make one, please tag me and use the hashtag #fpptablet – I can’t tell you how excited seeing your version pop up in my feed will make me.
- Click Link Above to Open the Pattern.
- DOWNLOAD it to your computer before printing (see this earlier blog post for why and paper options).
- Remember the printed side looks reversed (so follow the title for the tilt you want in your block).
These are two other free patterns I recommend for beginners since they’re simple and repetitive:
Prep your Pattern Page
The three goals of this preparation stage:
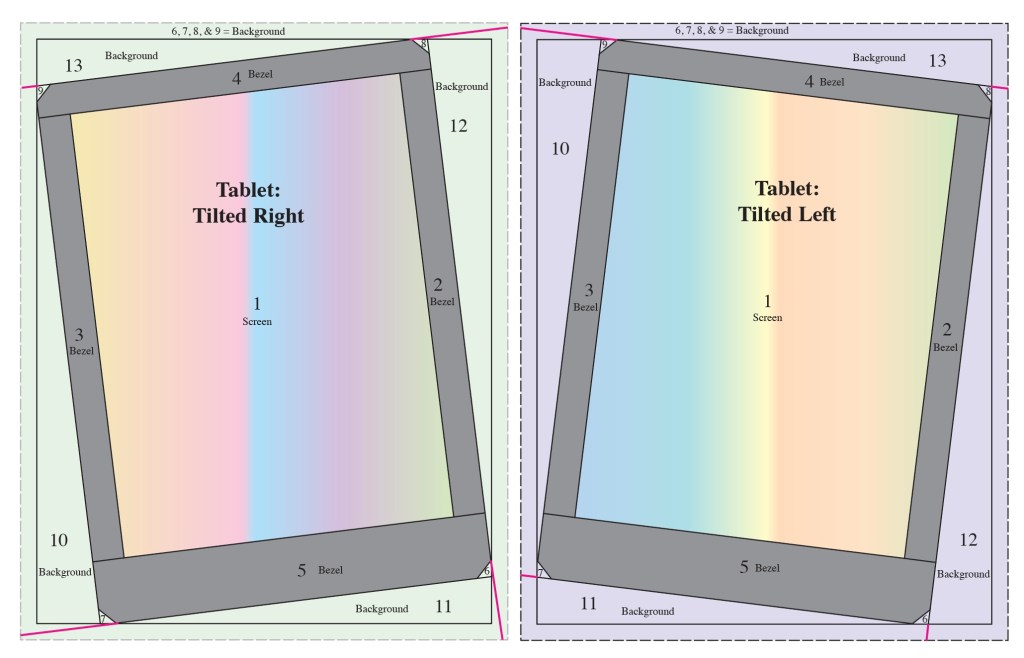
- Color your pattern so you can know at a glance which color fabric goes where.
- Identify and extend your stitching lines into the seam allowance in advance.
- Trim off any extra blank space on the page.
Why extend the stitching lines into the seam allowance? Honestly, you don’t technically have to. I do strongly recommend doing it, though; because sometimes when you’re stitching individual segments within one pattern to another segment, or if you are adding borders onto a one segment pattern like my tablet pattern, the top fabric in the seam allowance can fold back on itself accidentally if the seams don’t go all the way to the edge of the seam allowance. Which means that when you’re done, you’ll have a weird raw-edged fabric flap sticking up from the seam on the front of your block. This is one of those tips you might choose to discard later in your FPP journey; but, for now, stitch them down so you don’t work really hard on your whole block only to have to rip a seam at the very end to tuck the raw edge flap back inside the seam allowance where it belongs. Personally, I rarely mark my lines any more, but I always stitch into the seam allowance where needed.
I like to do a lot of tiny FPP, and fighting seam bulk is a thing at that scale. I only want to sew into the seam allowance for the seams I absolutely need to (versus every seam – avoiding thread buildup in the seam allowance). That’s why I recommend marking the stitch lines in descending order instead of extending every stitch line into the seam allowance. Learn the habit now, and you’ll be set for all scales of fpp in your future!
Reference Diagrams for my Pattern
Tips for Marking Other Patterns
If the pattern (or pattern segment) you’re using is not built in a round like my tablet pattern (or the wonky log cabin quilt block linked above), marking the stitch lines is a little less intuitive, but the principle remains the same. Start with the largest number and extend the line into the seam allowance. Look for other pieces that are near the seam allowance, in descending numerical order, and extend any lines unless a higher numbered piece already blocks off that number.
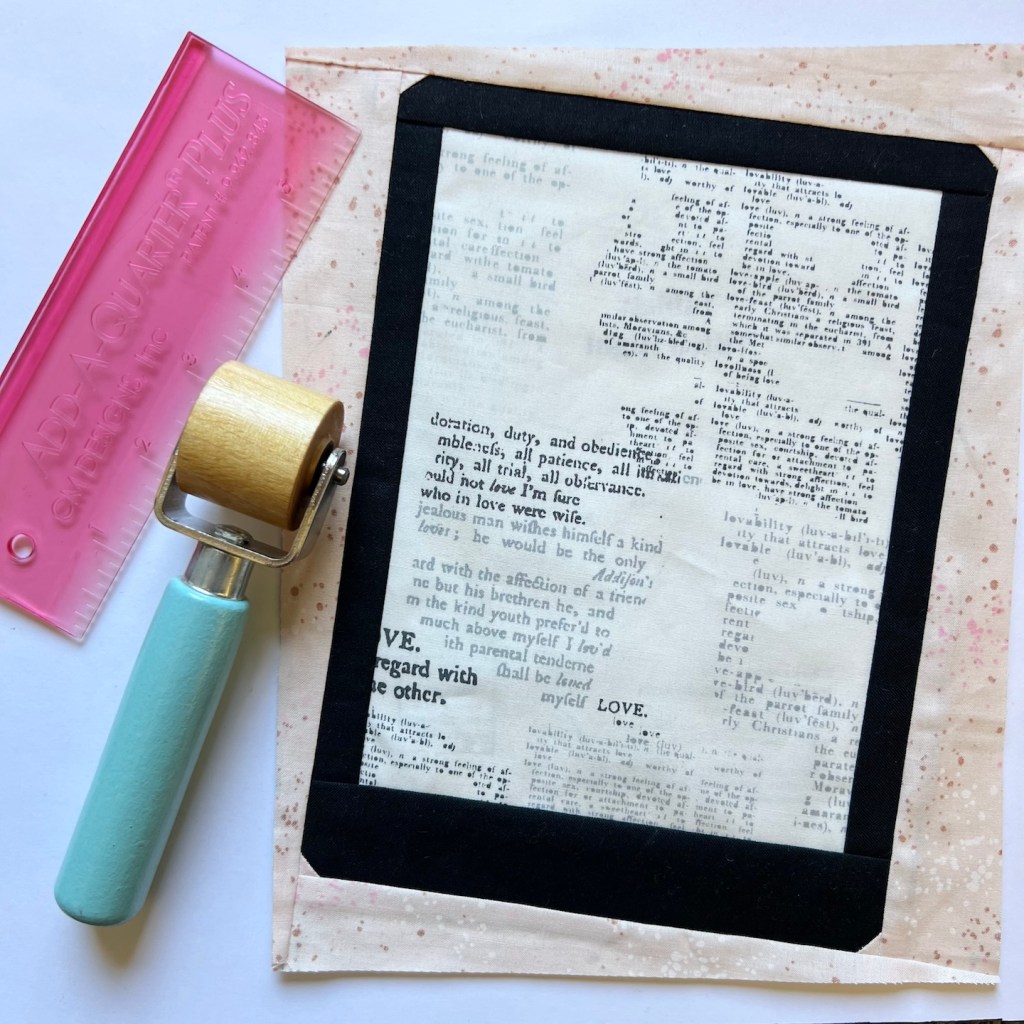
Here’s an example using a segment from one of my other fpp patterns (note markings in hot pink along the edge (the center hot pink markings serve another purpose in the original pattern):

- I started with piece 15: extending the line on both sides into the seam allowance.
- Lines near pieces 14, 13, 12, 10, and 6 also needed to be extended.
- If I hadn’t gone in descending numerical order, I might have mistakenly extended the lower line bordering shape 1, adding to unnecessary thread buildup in the seam allowance.


Leave a comment